Invoice Parking
Invoice parking is the first menu in the sidebar of the application. All the invoices approved by the invoice reception are available at the Invoice parking level for doing parking in SAP. This user is responsible for doing Invoice Parking at SAP after MIRO simulation and tax validation.
There are three types of invoices under Invoice Parking
- Vendor Invoices
- Transport Invoices
- Discarded Invoice

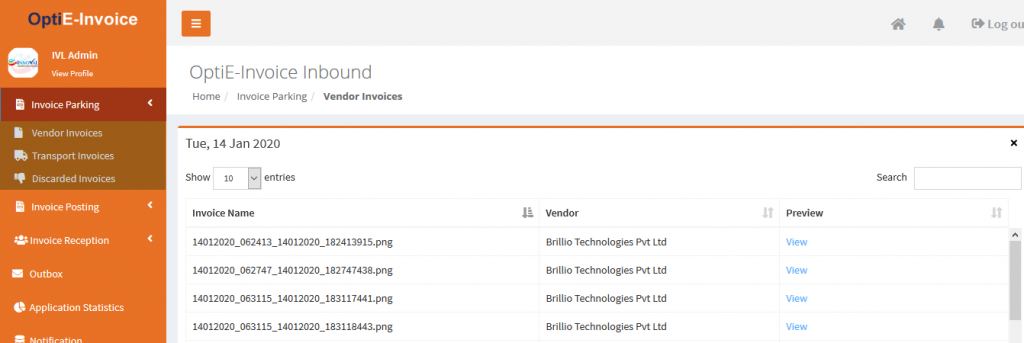
In the parking dashboard, you have the list of pending invoices which are represented as different tiles on the dashboard. The tiles also show the count of invoices pending under that category.

To see the invoices under a particular date, just click on the corresponding box.

To view the invoice click on view. Invoice will open

To open an invoice for processing, you can click anywhere on the corresponding row. The invoice screen will like this.

When the page is loaded, the side menu will be collapsed by default irrespective of the layout you have selected. If you wish to, you can expand it manually.
If you get an error like this on top of the page, it means that connection with SAP through your ID mapped in your profile was unsuccessful.
The page is divided into different segments representing different information. On the top left of the screen, you can see the preview of invoices. The area from which the data is extracted is shown inboxes. These boxes are automatically identified by the system. To see the text extracted from that area, you just bring the mouse cursor over it and text will be displayed as a tooltip.

The second segment is on top right where all the data corresponding to the template needs to provide. The segment consists of 4 tabs as shown below.

When a user arrives on the screen, the fields will be populated with data that has been extracted from the invoice. The fields for which inbound couldn’t verify the data, the fields will be blank.
In case the PO has not been read from the invoice, you can select it from the list. To find out a PO from a list, just type in the sequence of numbers present in the PO and the list will get filtered accordingly. Inbound allows posting with multiple POs as well.

When the PO is selected, the GRNs of the corresponding PO will be listed at the bottom of segments 1 & 2. This is the third segment of the page.

If the reference number provided in the GRN matches with the invoice number, it will be selected by default. Or else you can select a GRN with which you want to proceed by checking the checkbox against the corresponding GR number.
The second tab called “Tax” contains details on the amount figures

The third tab called “Basic” contains other header level details like Header Text, Payment Terms etc.

If the user wants to add any additional G/L, it can be done in the fourth tab

To add more G/Ls, click on add row and enter the details. GL will be validated as you enter it and the description will be populated automatically. To save the changes made, click on. To close the popup, click  button.
On the bottom of Segment 3, you have the options shown below which is the fourth segment.

To proceed further user needs to validate the data. For this click on  button. Please note that validation is mandatory for all invoices, so it will be invoked even if you try to click the “Post Invoice” or
  button directly.

During validation, the basic mandatory fields like invoice number, purchase order, date, etc. will be validated. After this, the amount of figures will be validated. Tax amounts are calculated through SAP using the tax procedure.
In case a value is not extracted from the invoice or a mismatching value is populated, the value based on a calculation by SAP will be displayed as 

The user can adopt the suggested value by simply clicking on it. Irrelevant fields will be disabled after this.
Once all amount fields are validated, total amount will be validated based on the sum of all values.
Once all values are corrected, user can simulate to see the MIRO simulation view.

The MIRO view is a preview of the invoice document created in SAP. This can also be viewed by going to reports and selecting the detailed view.
Once the Miro Simulation is ok, then the user can park the document by pressing Park button,

